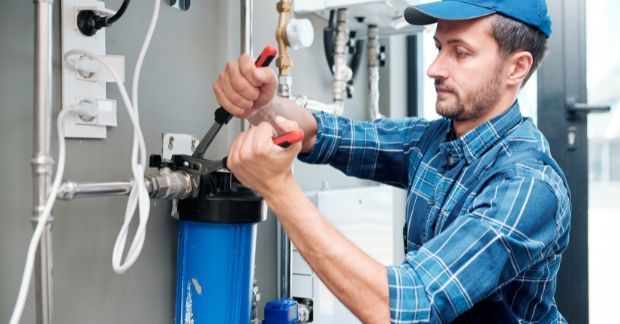
Don’t Wait Until Winter: Schedule Your Boiler Service with Ninja Plumber
As winter approaches, ensuring your boiler is in optimal condition becomes essential. A reliable boiler is key to keeping your home warm and comfortable during the colder months. It’s wise to schedule your boiler service early with a trusted Fulham plumber
to avoid any last-minute issues when temperatures drop.
Why Early Boiler Service is Crucial
Getting ahead of winter by scheduling a boiler service has multiple benefits. Here’s what to expect when you book a service with a Fulham plumber:
- Comprehensive Inspection: The boiler engineer will conduct a thorough check, examining all parts for wear, damage, or corrosion. This ensures that any small issues are fixed before they develop into more serious problems.
- Cleaning and Maintenance: Components such as burners, heat exchangers, and vents will be cleaned, and any worn-out parts will be replaced. This process helps improve the efficiency of your heating system.
- Safety Testing: A crucial aspect of the service includes checking for potential gas leaks and carbon monoxide emissions, ensuring your home remains safe.
- Efficiency Assessment: The engineer will also test the boiler’s performance, adjusting settings where necessary to maximise efficiency, potentially saving you money on energy bills.
Scheduling a boiler service in Fulham before winter means that your heating system will be in top condition, reducing the risk of costly breakdowns.
The Benefits of Regular Boiler Maintenance
A well-maintained boiler not only ensures a warm home but also delivers various long-term benefits:
- Safety: Regular checks are vital for identifying hazards like gas leaks or carbon monoxide emissions. A Fulham plumber can help keep your home safe through routine safety inspections.
- Efficiency: Over time, boilers accumulate dirt and debris that can reduce their efficiency. Routine maintenance keeps your boiler running smoothly, cutting energy consumption and lowering bills.
- Extended Lifespan: Maintenance helps reduce wear and tear on vital components, allowing your boiler to last longer and delaying the need for a costly replacement.
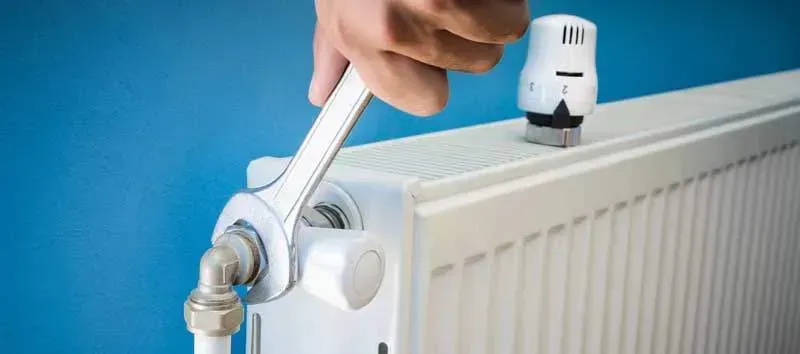
What Happens During a Boiler Service?
When you schedule a boiler service in Fulham, here’s what you can expect:
- Inspection: Every component is inspected to ensure there’s no damage or corrosion.
- Cleaning: Key parts are cleaned to improve performance.
- Efficiency Check: The boiler’s efficiency is tested and optimised.
- Safety Check: The engineer checks for potential leaks and ensures the system is running safely.
These thorough checks ensure that your boiler is working efficiently and safely, giving you peace of mind as winter approaches.
What Happens If You Skip Boiler Maintenance?
Neglecting regular maintenance can lead to several issues, including:
- Higher Energy Bills: An inefficient boiler uses more energy, raising your bills unnecessarily.
- Shortened Boiler Lifespan: Regular wear and tear can shorten the lifespan of your boiler if left unchecked.
- Safety Risks: Without regular checks, your boiler could develop potentially dangerous issues, such as carbon monoxide leaks.
Scheduling regular maintenance with a Fulham plumber can help avoid these problems and ensure your home stays warm and safe throughout the winter months.
How Often Should a Boiler Be Serviced?
Boiler servicing is generally recommended once a year. However, newer models may require less frequent checks. To ensure you’re following manufacturer recommendations, consult a professional for boiler servicing in Fulham.
Avoid Emergency Repairs
Booking a boiler service
early also reduces the chance of needing emergency repairs during winter when heating engineers are busiest. It’s better to plan ahead and avoid the risk of being left without heat in the coldest months. Regular servicing helps identify issues early, preventing costly and inconvenient emergency repairs.
Final Thoughts
Winter is the busiest time for heating engineers, so it’s best not to delay. Contact Ninja Plumbers now to schedule your boiler service in Fulham. Preparing in advance ensures your home remains comfortable and warm throughout the cold season. Don’t wait until an emergency strikes—book your service today for peace of mind.
Contact Ninja Plumbers at 07447575645
or visit 17 Fulham High St, London SW6 3JH to schedule your boiler service and keep your home warm and efficient this winter.
You might also like
Blog

Stay Calm and Assess the Problem The first step during any plumbing emergency is simple. Stay calm and assess the situation. Panic often leads to mistakes. Instead, take a quick look at the issue and identify the source. Ask yourself: Is water actively leaking? Is the leak small or severe? Is it coming from a pipe, appliance, or fixture? If you can locate the source, you can often slow the damage until your emergency plumber Fulham SW6 specialist arrives. Even basic steps can make a big difference. Shut Off the Water Supply Immediately Stopping the water flow is the most important step. Most homes in Fulham have a main stopcock. You usually find it in one of these places: Under the kitchen sink In a utility cupboard Near the front door In the basement Turn the valve clockwise to stop the water supply. This single step can prevent flooding and major structural damage. If the problem involves one fixture, you may only need the isolation valve. These valves sit behind toilets, sinks, and washing machines. If you cannot find the stopcock, a plumber in Fulham can show you its location during routine maintenance. Knowing where it is saves precious time during emergencies. Turn Off Your Boiler and Heating System Water leaks near heating systems create extra risk. If a pipe bursts near your boiler or radiators, turn the heating off immediately. This protects both the boiler and your home. Most systems allow you to shut them down easily from the control panel. If you notice pressure dropping or strange noises, avoid restarting the system. Wait for your emergency plumber Fulham SW6 technician to inspect the setup first. Contain the Water and Protect Your Home After stopping the supply, focus on controlling the remaining water. Even small leaks can cause damage to flooring, furniture, and electrics. Use quick solutions like: Buckets or bowls to collect drips Towels to absorb spreading water Mops to remove pooling water Plastic sheets to protect furniture If water reaches electrical outlets, turn off electricity in that area. Safety always comes first. Quick containment also helps your plumber in Fulham repair the problem faster once they arrive. Clear the Area Around the Leak Your plumber needs space to work. Move items away from the affected area if possible. Focus on clearing: Cabinets under sinks Storage near pipework Items around the boiler Furniture near leaks This speeds up the repair process. It also protects your belongings from further water exposure. When homeowners search Plumber near me, they often overlook this simple step. Yet it can save valuable time once help arrives. Common Plumbing Emergencies in SW6 Homes Many homes in Fulham share similar plumbing challenges. Older properties and Victorian terraces often have ageing pipework. These homes frequently experience the following issues. Burst Pipes Cold weather and pipe corrosion can cause pipes to burst. Water pressure forces water out rapidly. This can flood rooms within minutes. Immediate shut-off prevents severe damage. Overflowing Toilets Blocked drains or faulty float valves often cause overflowing toilets. Shut off the isolation valve behind the toilet. Avoid flushing again until a plumber in Fulham checks the system. Boiler Leaks Boiler leaks may signal internal component failure. You may notice: Water pooling below the unit Low boiler pressure Strange noises during operation Turn the boiler off and call an emergency plumber Fulham SW6 specialist immediately. Blocked Drains Severe blockages can force water back through sinks or showers. Avoid chemical drain cleaners. These often damage pipes. Professional tools remove blockages safely. Why You Should Call an Emergency Plumber Quickly Plumbing problems rarely fix themselves. Small leaks often become major issues. Quick action protects your property and reduces repair costs. A professional emergency plumber Fulham SW6 technician brings tools and experience to solve problems fast. They can: Detect hidden leaks Repair burst pipes Restore water supply safely Inspect the wider plumbing system Trying complex repairs without training can make things worse. Professional help always provides the safest solution. How Ninja Plumbers Respond to Emergencies Local plumbing experts understand Fulham properties well. Many homes feature older pipe layouts and tight access points. Experienced plumbers arrive prepared with specialist equipment. A typical emergency visit includes: Rapid inspection of the issue Immediate leak control Temporary or permanent repair Pressure and safety checks This structured response ensures your plumbing system works safely again. A reliable emergency plumber Fulham SW6 service focuses on both quick repairs and long-term reliability. Prevent Future Plumbing Emergencies While some plumbing issues occur without warning, many emergencies can be prevented. Simple maintenance reduces the risk of sudden leaks or failures. Schedule Regular Plumbing Inspections Routine inspections catch problems early. A professional plumber can check: Pipe corrosion Boiler pressure Valve condition Hidden leaks Early repairs prevent costly emergencies later. Protect Pipes During Cold Weather Frozen pipes often burst when temperatures drop. Insulate exposed pipework in lofts, garages, and basements. This small step prevents serious winter plumbing issues. Avoid Drain Blockages Blocked drains often develop slowly. To prevent them: Avoid pouring grease down sinks Use drain strainers Dispose of food waste properly These habits keep your plumbing system running smoothly. Final Thoughts Plumbing emergencies create stress for any homeowner. Leaks, bursts, and boiler problems often appear at the worst possible time. Knowing how to respond makes a huge difference. Simple actions like shutting off water, protecting your home, and clearing the workspace help limit damage while you wait. Searching for a Plumber near me usually leads to experienced professionals who know Fulham homes well. When problems strike, a skilled emergency plumber Fulham SW6 specialist can quickly restore safety and functionality to your plumbing system. Fast action today can prevent costly repairs tomorrow.
Why Older Heating Systems Need Power Flushing Older boilers and radiators often suffer from accumulated sludge and corrosion. This build-up restricts water flow, leading to: Cold spots in radiators Slow heating times Strange noises from pipes Higher energy consumption Ignoring these issues can lead to costly repairs or even a complete system failure. Regular power flushing ensures your heating system runs efficiently and reliably. By using professional power flushing services, you remove sludge and debris thoroughly, restoring water circulation and heat distribution. This process directly improves central heating efficiency improvement , saving money and reducing environmental impact. Step 1: Preparing the Heating System Before starting a power flush, preparation is key. Follow these steps: Turn off the boiler and allow the system to cool. Isolate sensitive areas such as boilers or electrical controls. Drain the system partially to remove old water and loosen sediment. Check radiator valves and ensure they are operational for flushing. Proper preparation prevents damage and ensures the process targets the right areas. Power flushing services often include a system assessment to identify problem radiators or pipework. Step 2: Conducting the Power Flush The actual flushing process involves circulating a cleaning chemical and water mix at high velocity to remove sludge and debris. The steps typically include: Connecting the flushing machine to the system via radiator valves. Adding a chemical cleaner to break down sludge and rust. Circulating the mixture through radiators and pipes at high pressure. Flushing with clean water repeatedly until water runs clear. Some systems may require additional steps, like removing stubborn sludge manually or using specialised nozzles. A professional technician ensures the process is thorough and safe. Benefits of Using Professional Power Flushing Services Hiring experts for power flushing services offers several advantages: Efficient sludge removal without damaging pipes Minimal system downtime while cleaning radiators and boilers Reduced risk of leaks compared to DIY methods Improved heating performance leading to central heating efficiency improvement Professionals can also apply corrosion inhibitors to keep your system clean longer, protecting your boiler and radiators for years. Step 3: Inspecting and Testing the System After flushing, inspect the heating system carefully: Check radiator temperature to ensure uniform heating. Monitor boiler pressure for stability. Look for leaks around joints and valves. Run a system efficiency test if available to measure energy savings. Correct inspection ensures the flush has removed blockages and that the system operates optimally. This final step also confirms the benefits of central heating efficiency improvement. Step 4: Maintaining Your Heating System Post-Flush After a successful power flush, proper maintenance is essential. Consider these steps: Install magnetic filters to catch future debris Schedule annual check-ups to monitor sludge build-up Use corrosion inhibitors in the system water Bleed radiators regularly to prevent trapped air Maintenance complements the benefits of power flushing services, keeping your heating system efficient for years. A well-maintained system avoids cold spots, reduces energy bills, and prolongs boiler life. Common Mistakes to Avoid During Power Flushing Even with careful preparation, mistakes can reduce the effectiveness of a flush. Avoid: Using too little cleaning chemical Flushing at low pressure, which leaves sludge behind Skipping inspection of radiators and pipe joints Ignoring post-flush maintenance Professional power flushing services minimise these risks, ensuring your older heating system gains maximum benefit. How Power Flushing Contributes to Central Heating Efficiency Improvement A flushed heating system provides better water flow, improved heat distribution, and reduced boiler strain. Key benefits include: Lower energy bills due to efficient heat transfer Longer boiler lifespan from reduced wear Quieter operation with fewer air pockets and sludge noise Even room temperatures across all radiators These improvements directly contribute to central heating efficiency improvement and a more comfortable home environment. When to Schedule Your Power Flush Power flushing is not a one-time fix. Older systems benefit from a flush every 5–10 years, depending on: Frequency of system use Signs of sludge, rust, or cold spots Age of radiators and boiler Scheduling regular power flushing services prevents long-term damage and keeps your heating system running smoothly. Power flushing services are vital for older heating systems struggling with efficiency. By removing sludge, improving water flow, and implementing post-flush maintenance, you can enjoy: Uniform radiator heating Lower energy bills Reduced boiler strain Long-term central heating efficiency improvement Ignoring sludge build-up leads to costly repairs and decreased comfort. Take action today and restore your heating system to peak performance. Professional power flushing ensures thorough cleaning and lasting benefits for your home.
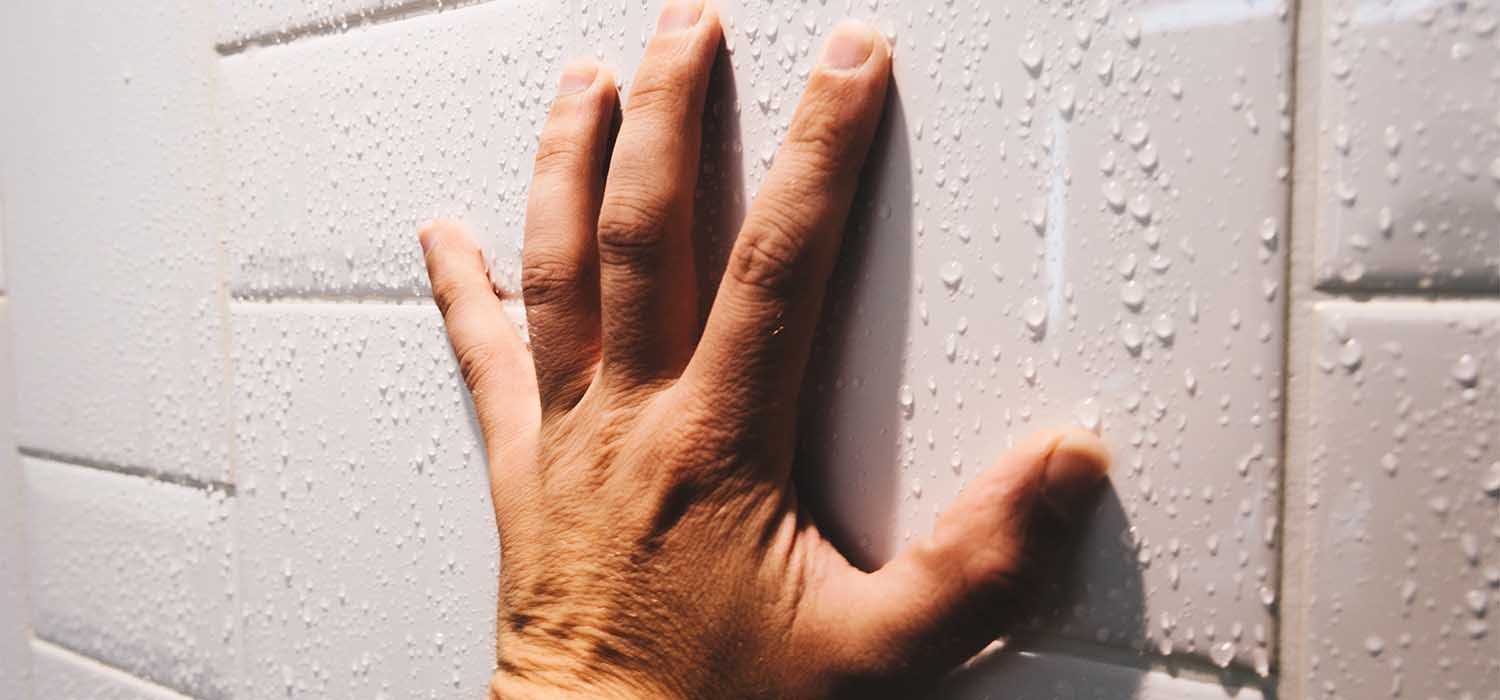
Understanding the Root Causes of Bathroom Leaks Before rushing to patch a leak, it’s essential to understand why it keeps happening. Common causes include: Worn-out seals and washers – Over time, rubber washers in taps or shower valves can degrade. Loose pipe connections – Joints behind walls or under sinks can loosen, causing hidden leaks. Faulty shower trays or tiles – Cracks in trays or missing grout can allow water to seep behind walls. Corroded pipes – Older metal pipes may develop pinholes or rust, triggering persistent leaks. Identifying the root cause will save time and money. Temporary fixes often lead to repeated bathroom leak repair calls. A thorough assessment helps prevent recurring issues. Step 1: Detecting the Leak Accurately Accurate detection is crucial. Start by inspecting all visible plumbing connections and surfaces: Check under sinks and around toilets for dripping water or signs of moisture. Examine the shower tray and tiles for cracks or mould. Feel walls and floors for damp patches that indicate hidden leaks. Use a moisture meter if available; it can reveal hidden damp areas behind walls. Tip: Some leaks only show when water is running. Test each faucet, shower, and toilet. Tracking the leak's source ensures the repair targets the real problem, not just the symptoms. Step 2: Choosing the Right Bathroom Leak Repair Method Once you have located the leak, select a suitable repair approach. Options include: Replacing washers or seals – Ideal for dripping taps or shower valves. Tightening pipe connections – Use appropriate tools to secure loose joints. Re-grouting or resealing trays – Perfect for leaks behind tiles or shower trays. Pipe replacement – For corroded or damaged pipes, replacement is often the most reliable solution. Always use quality materials. Cheap or temporary fixes often fail, leading to repeated repairs and higher long-term costs. Damp Source Protection Strategies When repairing a leak, consider damp source protection strategies to prevent further water damage. Some effective strategies include: Installing waterproof membranes behind tiles in wet areas. Applying sealant around pipe penetrations to block moisture ingress. Using anti-condensation paint in areas prone to humidity. Incorporating these steps during repairs adds a layer of protection that reduces future leaks and damp problems. Step 3: Addressing Hidden Damage Recurring leaks often leave behind hidden damage, which can worsen over time. Check for: Mould growth on walls, ceilings, or under flooring. Warped or rotting wood behind cabinets or around floorboards. Weak grout or plaster that may crumble after repeated water exposure. Fixing visible leaks alone isn’t enough. Addressing hidden damage ensures that bathroom leak repair is complete and prevents costly follow-up repairs. Step 4: Implementing Preventative Measures After repairs, prevent future leaks by taking simple steps: Regularly inspect plumbing – Check taps, valves, and visible pipes every few months. Clean drains and traps – Blockages can increase pressure and lead to leaks. Monitor water pressure – Excessive pressure can strain pipes and fittings. Upgrade old fittings – Replacing outdated taps or showerheads reduces risk. Adding preventative maintenance to your routine complements damp source protection strategies and reduces the chance of recurring leaks. When to Call a Professional Even with careful DIY work, some bathroom leak repair tasks are best left to professionals. Call an expert if: The leak persists despite repairs. You suspect hidden pipe corrosion. You notice widespread damp or mould. Repairs involve complex connections or gas/water systems. Professional plumbers can implement long-term solutions and ensure damp source protection strategies are correctly applied. Recurring bathroom leaks are more than just an inconvenience. They can damage your home, increase bills, and encourage mould growth. Tackling leaks with a structured approach—accurate detection, proper repair, hidden damage assessment, and preventative strategies—ensures your bathroom stays safe and dry. Remember to include damp source protection strategies in every repair. Simple steps like waterproof membranes, proper sealing, and anti-condensation treatments can save thousands in future costs. Taking these measures will minimise recurring bathroom leak repair needs, protect your home, and give peace of mind. Don’t ignore small leaks—they are often the first sign of a larger problem.